Installing Ennetix Endpoint
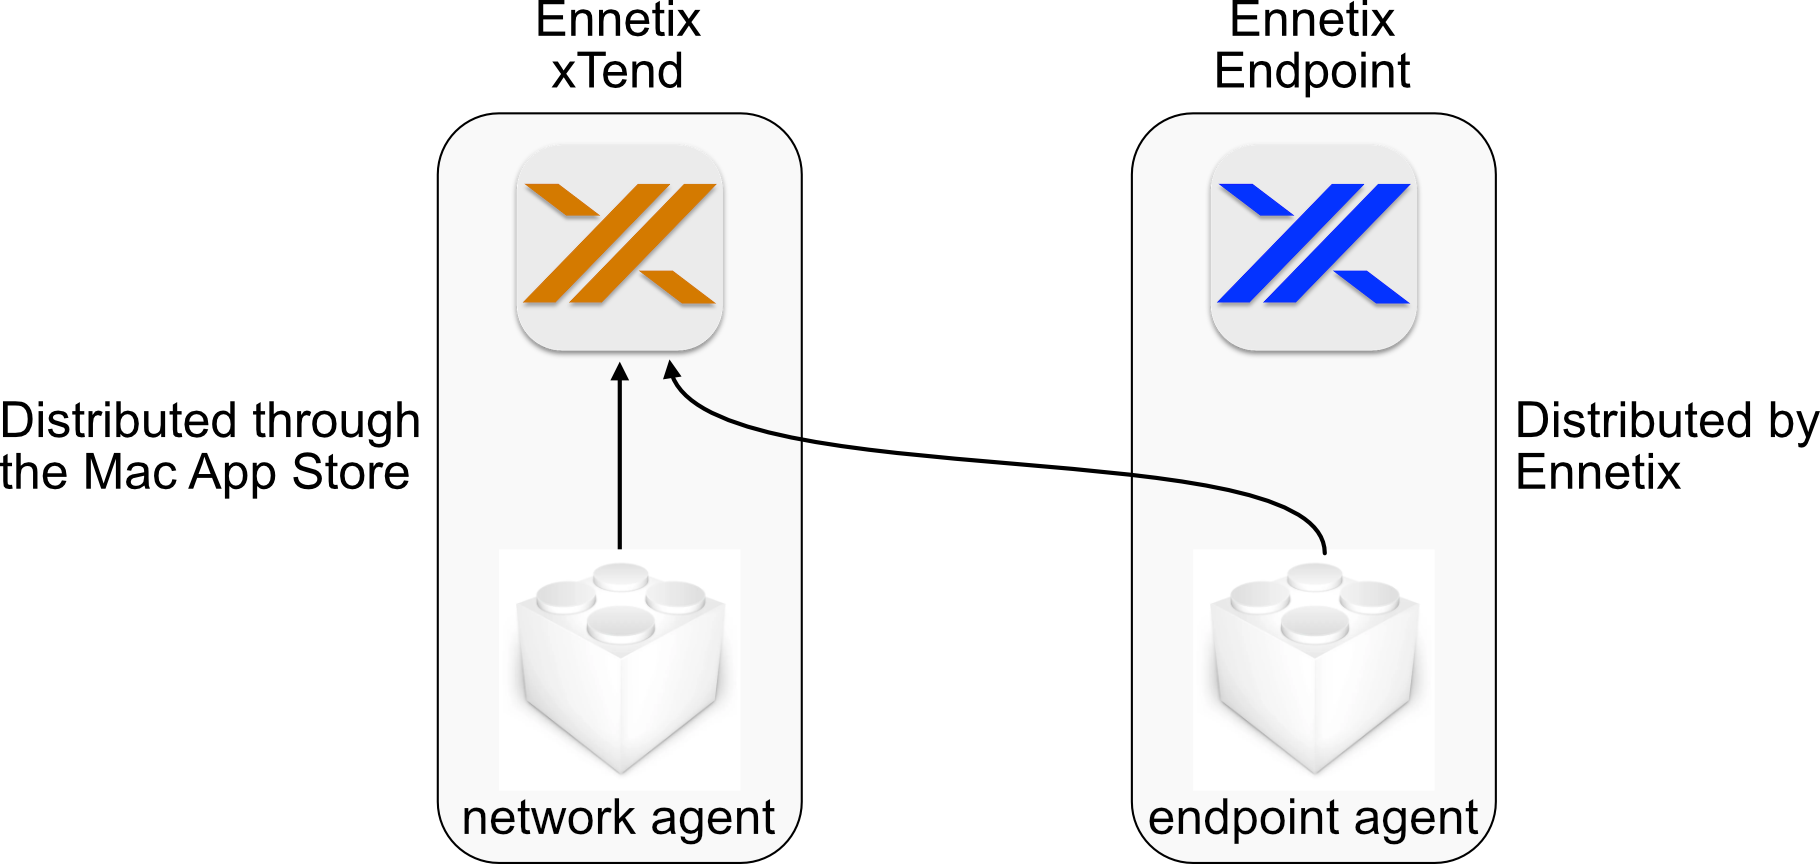
Two Ennetix programs, one experience
Due to Apple’s App Store policies, Ennetix is required to distribute the program that installs the endpoint agent outside the Mac App Store. This document is about installing the Ennetix Endpoint application.
For information about installing the test version of Ennetix xTend, see Getting started testing xTend.
This document walks you through:
downloading and running the Ennetix Endpoint installer package
Installing the endpoint agent
troubleshooting
Downloading and running the Ennetix Endpoint installer package
The current version of the Ennetix Endpoint installer package can be downloaded by clicking the following link:
https://xvisor.blob.core.windows.net/public/xtend/mac/EnnetixEndpointInstaller.pkg
Your web browser should download the installer into your Downloads folder.
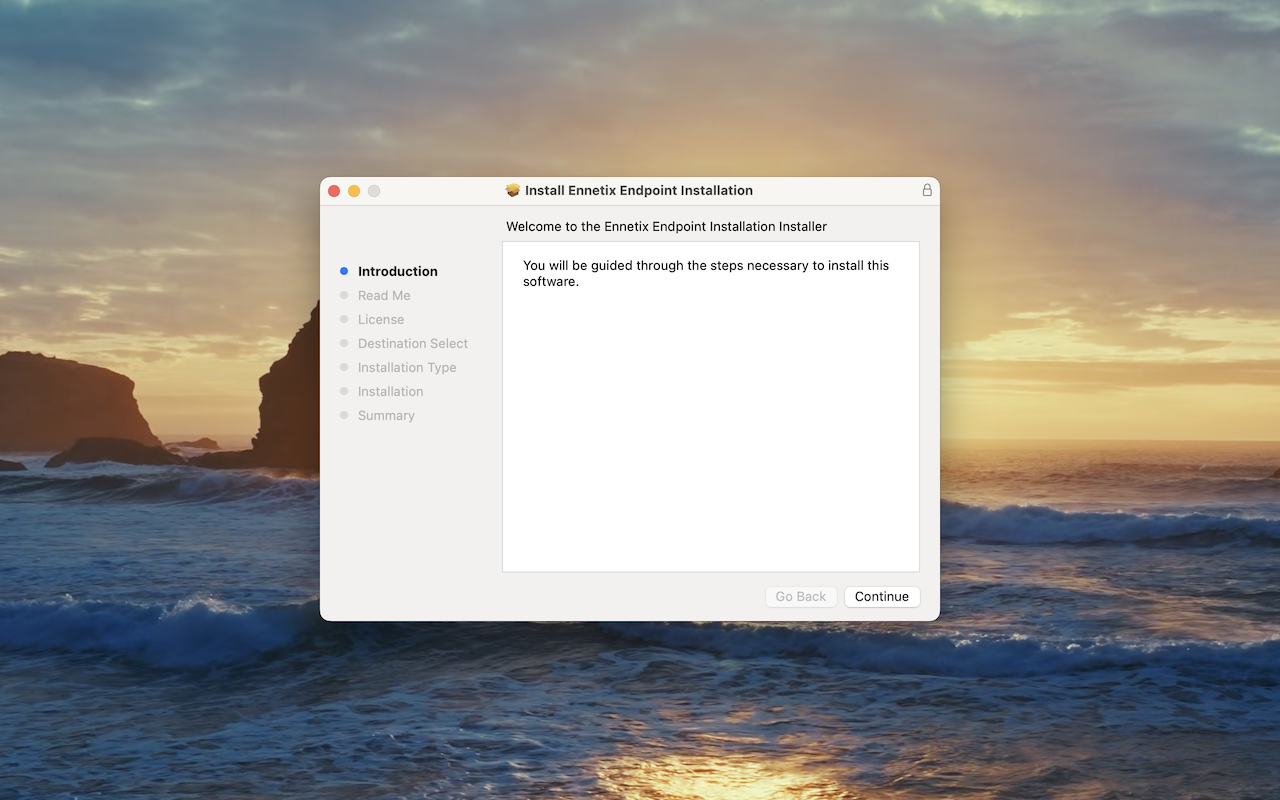
Double-click the installer package (the icon is a small brown box that is opened). The installer should start. Follow the instructions, and Ennetix Endpoint will be installed in your Applications folder.
Running the installer package
Installing the endpoint agent
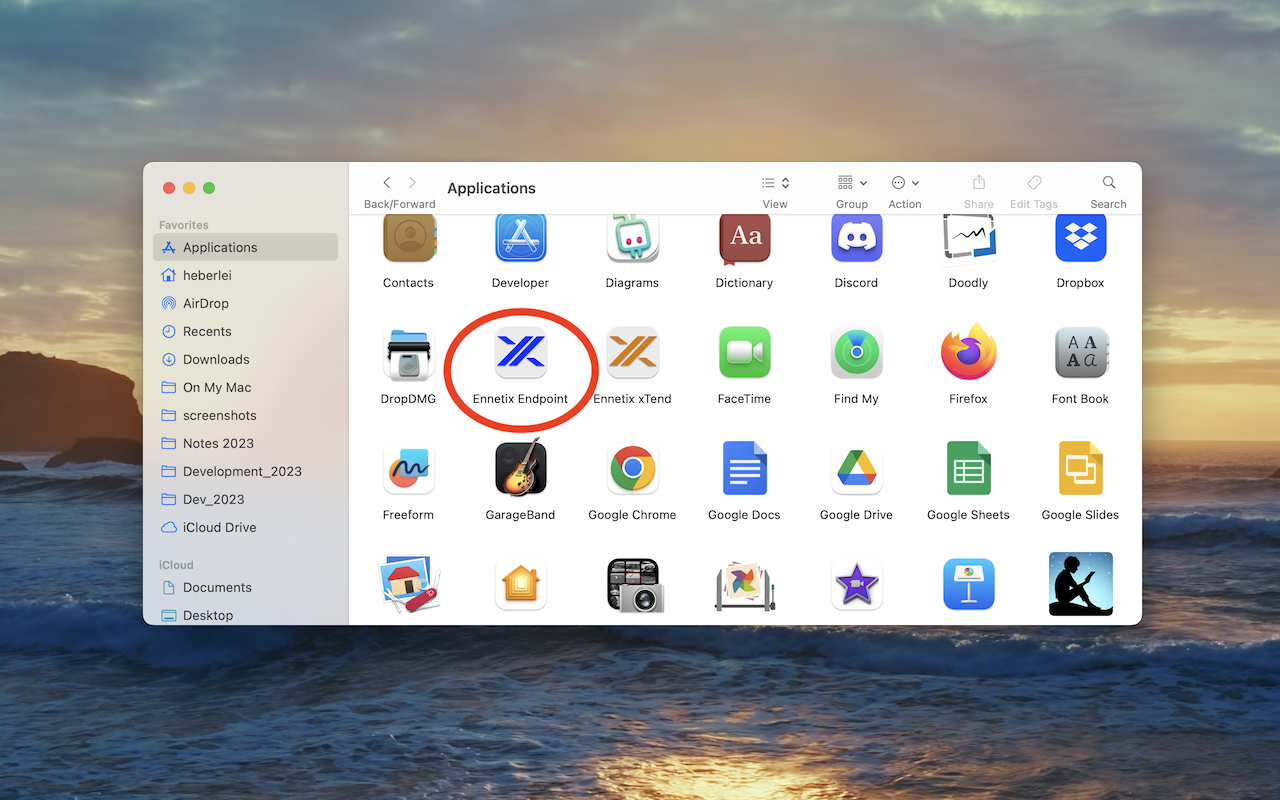
Open the Applications folder on your Mac, find the Ennetix Endpoint application. The icon is a blue ‘X’, and double click the icon to run the Ennetix Endpoint application.
Double click on “Ennetix Endpoint” - the blue ‘X’
The Ennetix Endpoint has one purpose - to install an endpoint agent.
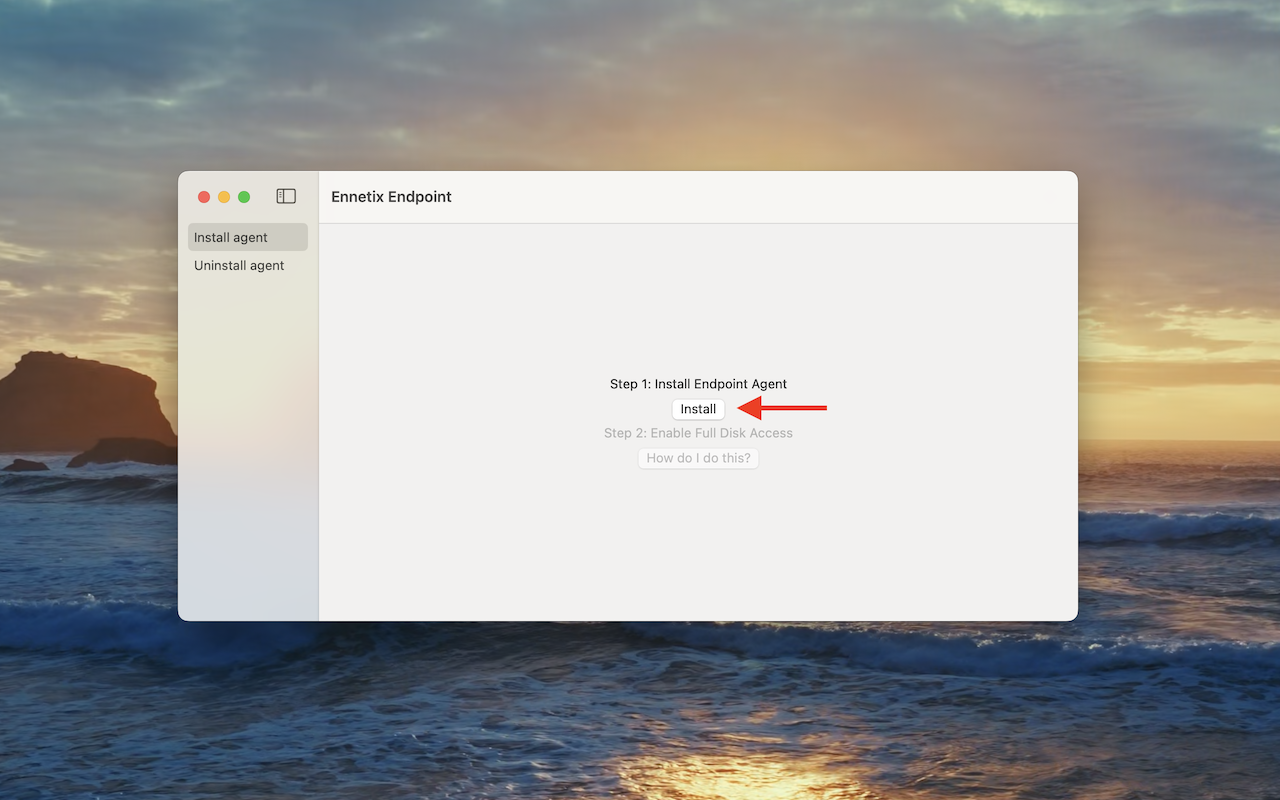
In the initial window, click the “Install” button.
Click “Install” to install the endpoint agent
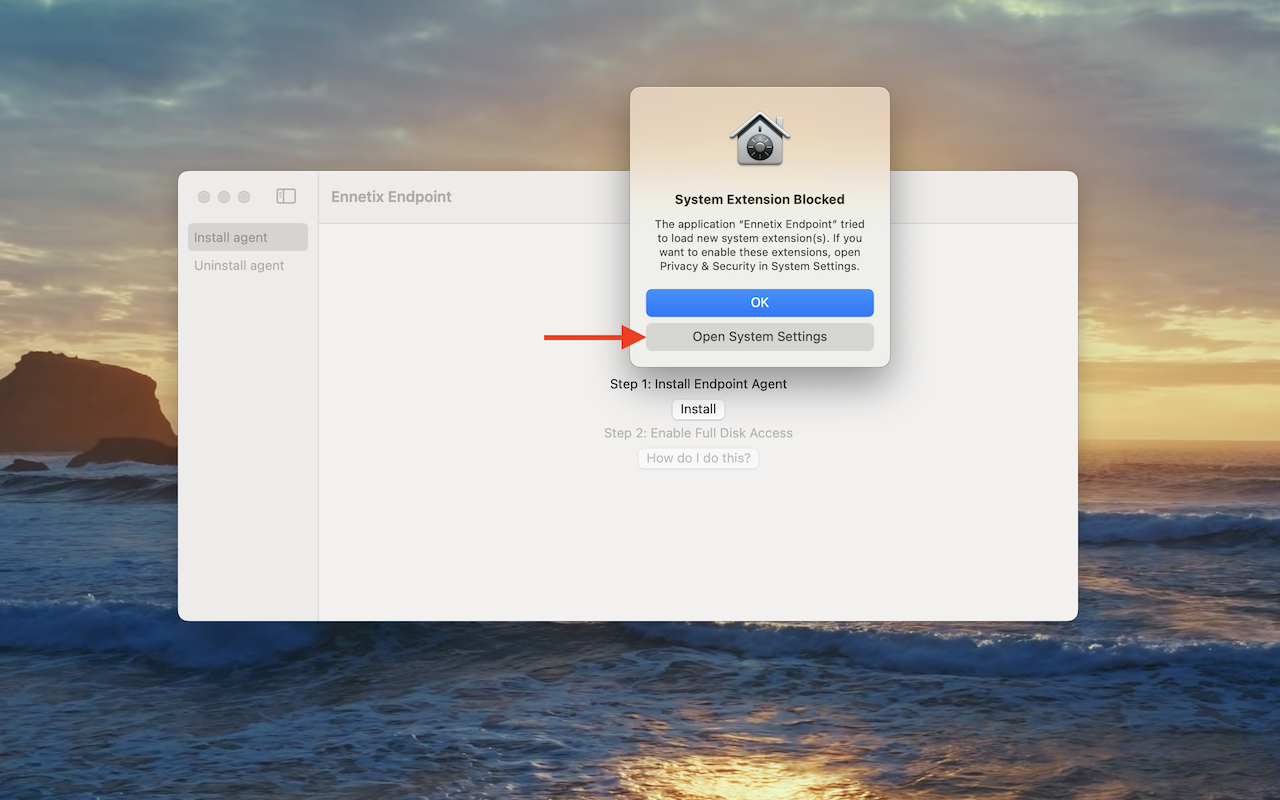
Your Mac will open a window stating that the installation of the network agent was blocked.
Click the “Open System Settings” button.
Click “Open System Settings”
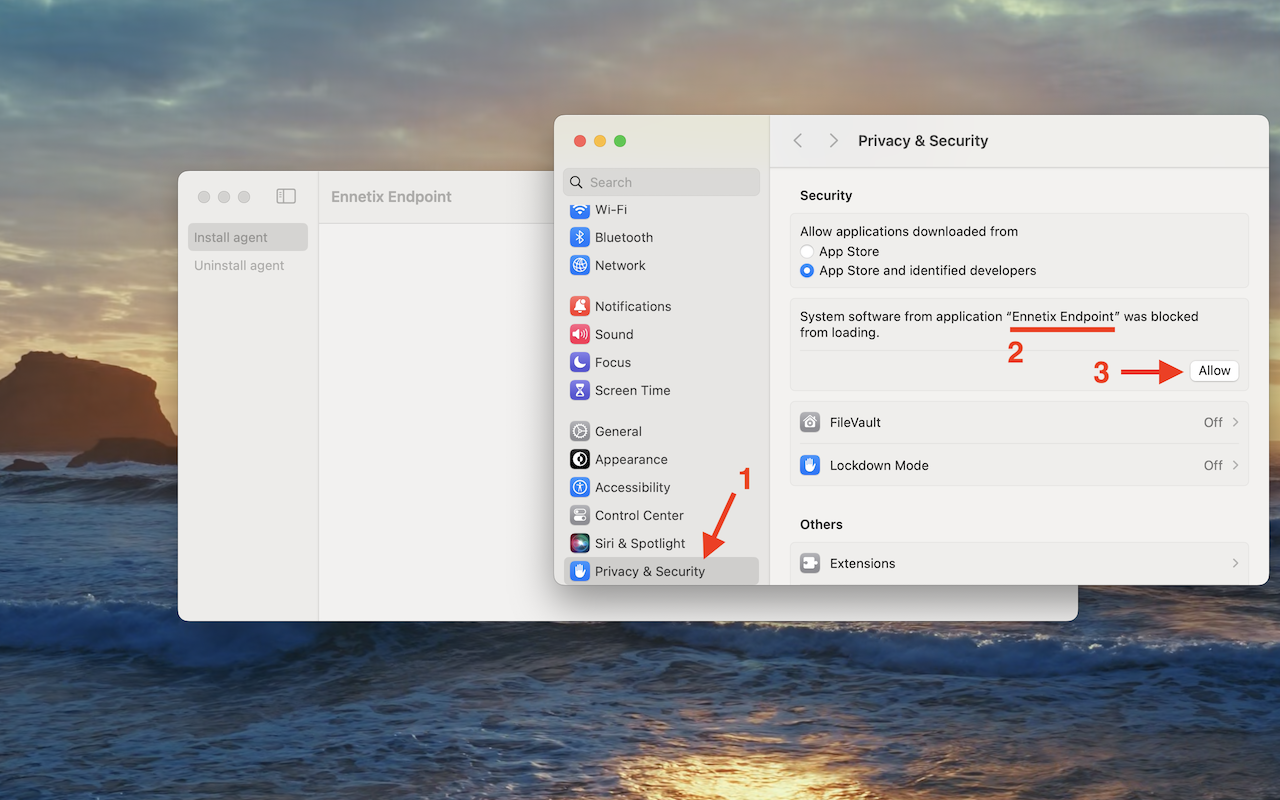
The System Settings window will open with “Privacy & Security” selected in the left pane (1) and the security section in the right pane. Identify the section stating that Ennetix Endpoint was blocked (2), and click the “Allow” button (3). (If you don’t see the prompt to “Allow” “Ennetix Endpoint”, see troubleshooting section below)
Click the “Allow” button
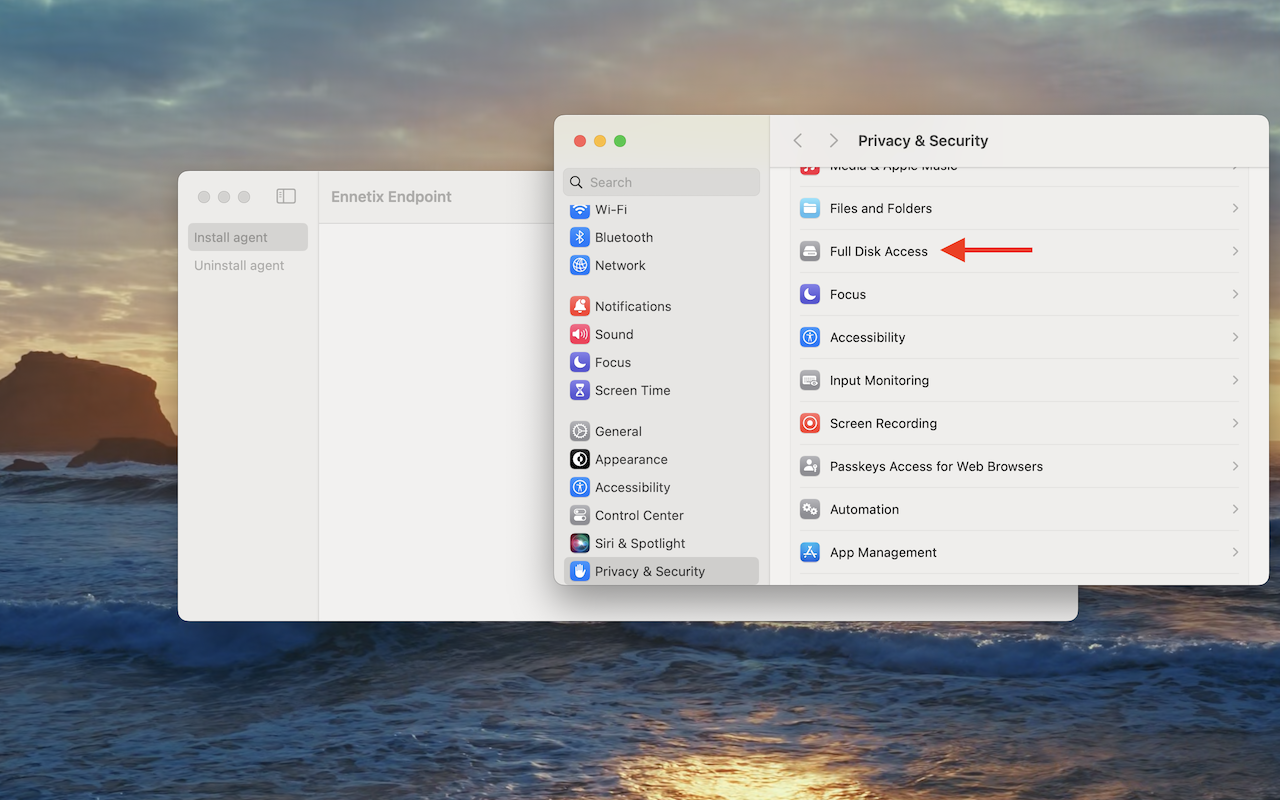
Remaining in the “Privacy & Security” section, scroll up to the “Full Disk Access” group, and click it.
Click “Full Disk Access”
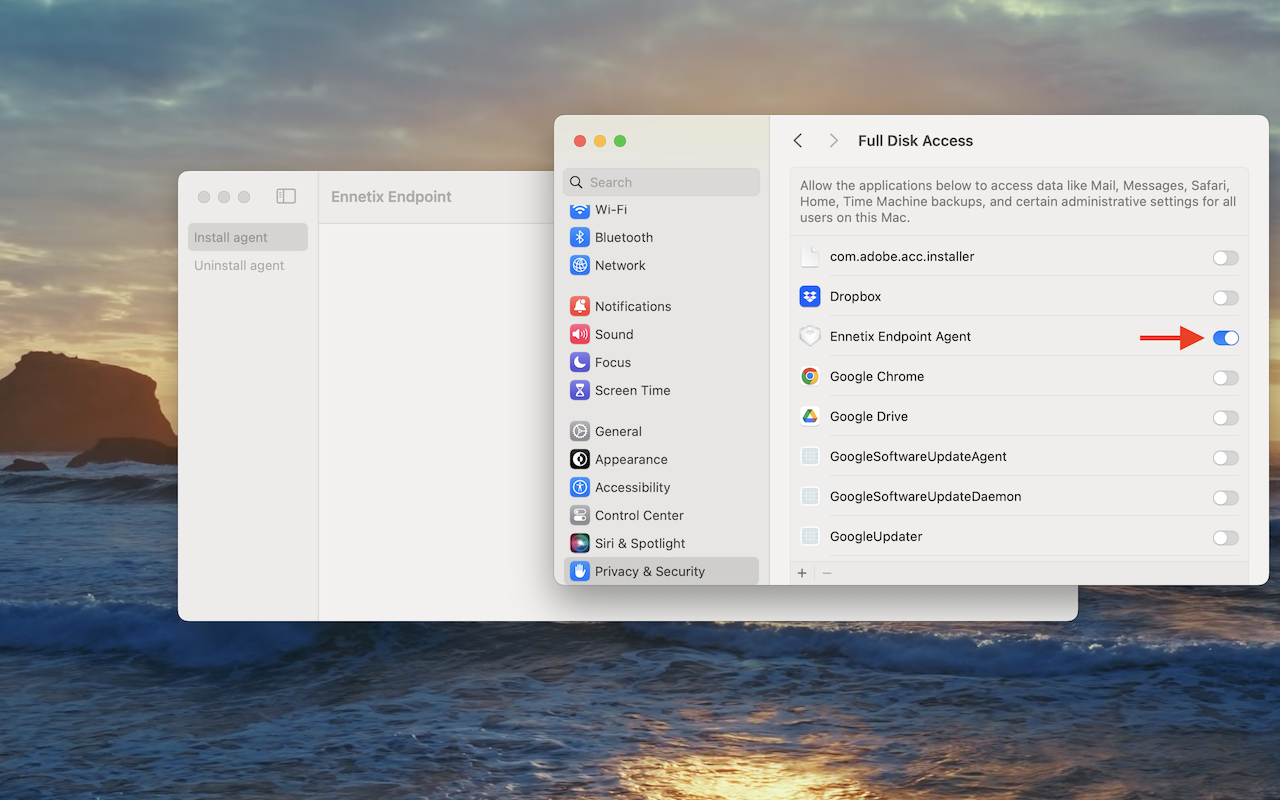
Find the entry for “Ennetix Endpoint Agent” and turn the switch to the enabled position.
Enable “Ennetix Endpoint Agent”
Congratulations! The endpoint agent is now installed and active.
You can now quit both Apple’s System Extension program and the Ennetix Endpoint program.
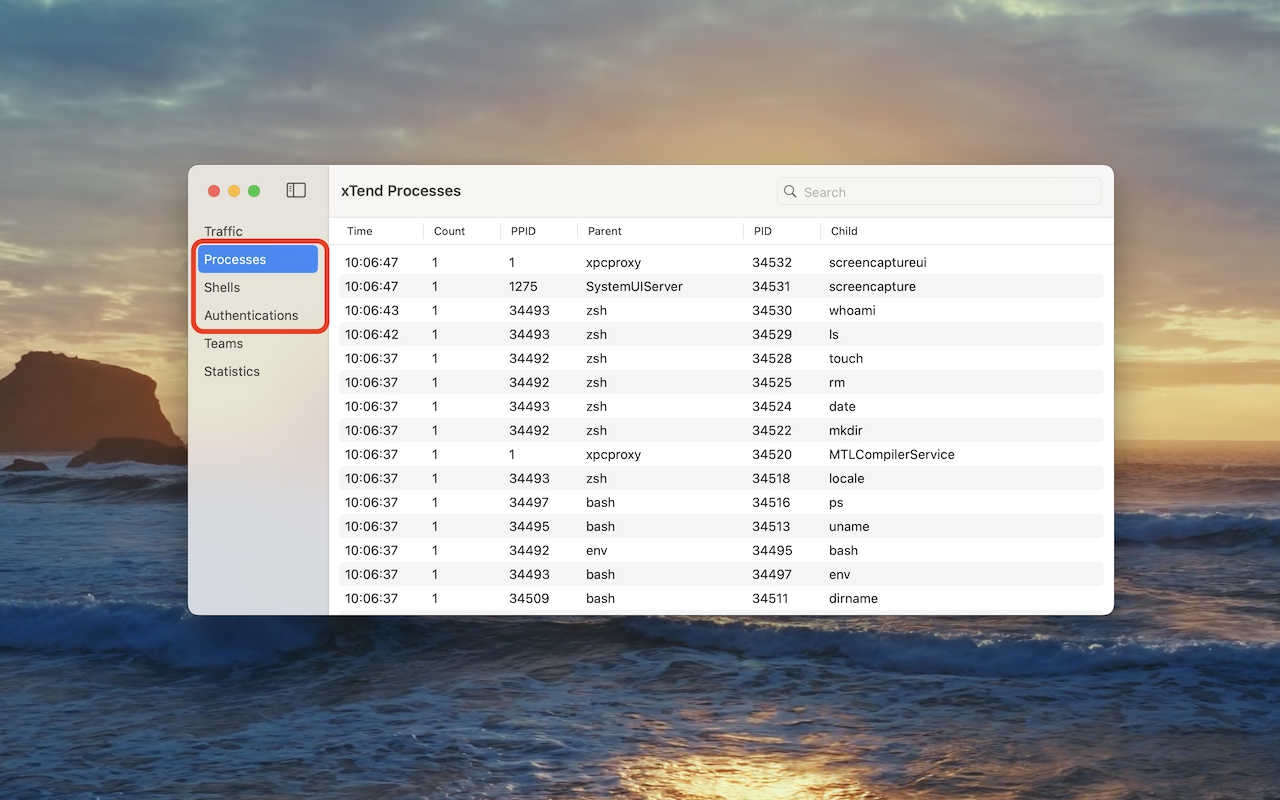
If the “Ennetix xTend” application is running (the app with the orange ‘X’), quit it and restart it. If xTend is not running, start it now. You should see three new tabs with new information.
xTend’s new capabilities
Troubleshooting
If you accidentally clicked the “OK” button instead of the “Open System Settings” button, just open “System Settings…” from the Apple menu. Then, in the left pane, select “Privacy & Security”, and then scroll down to the Security section in the right pane.
If you don’t see the “Allow” button for “Ennetix Endpoint” in System Settings, it may be due to several other system extensions waiting to be installed (see figure below). In this case, click the “Details” button, a new window with a list of system extensions will pop up, find Ennetix Endpoint in that list, and slide the button to the enabled position.
When multiple system extensions (not just Ennetix Endpoint) are pending, this is the view you will see. Click the “Details” button
